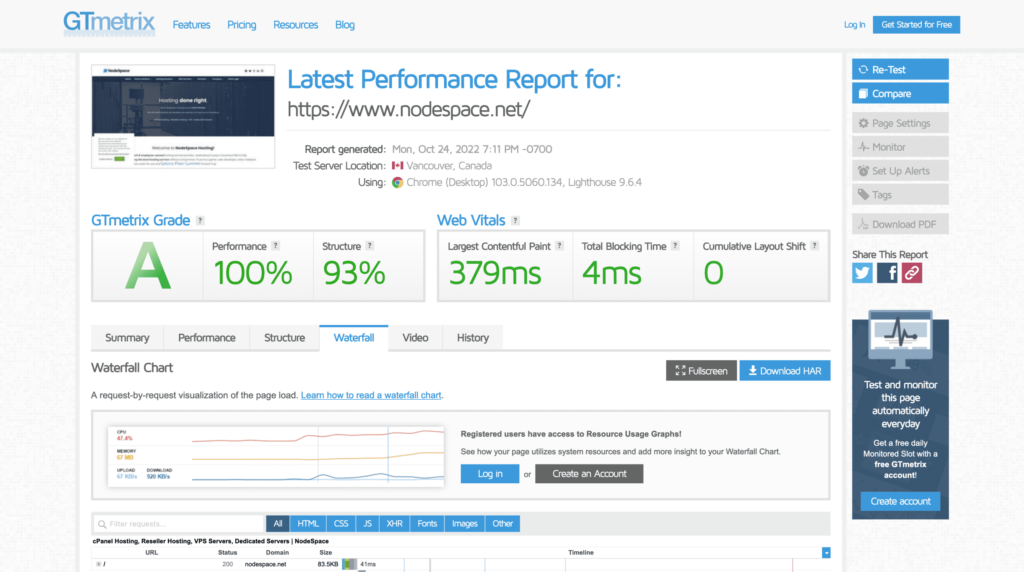
One of our most popular blog posts is Speeding up WordPress with these 3 plugins and that post is from 2017. Here we are in 2022 and people still want to know how to make WordPress fast. A lot has changed since then, but I’m going to show you the tips and tricks we use to speed up the NodeSpace website. This is how we took our website from constantly getting a C-F rating on GTMetrix to getting a 100% A. As always, before you start making major changes to your site, make a full backup (database AND files!).
It starts by debloating
Remove plugins you don’t need
If you’ve had your WordPress site for a long time, chances are you have a lot of bloat. Look through your plugins list. How many of these do you actually use? How many of them are just inefficient and slow? How many are causing your site more harm than good? Find them, deactivate them, and most importantly, delete them. We had over 85 plugins on the NodeSpace site. Not all of them were active but a good number were. A lot were left-overs from old themes or integrations we had. No longer needed, we quickly disabled them to verify nothing broke and then deleted them.
Some plugins also load a lot of JavaScript and/or CSS. Some of these plugins offer ways to help load only what is absolutely needed. After all, that makes the file size smaller. Smaller file means faster loading.
Optimize your media
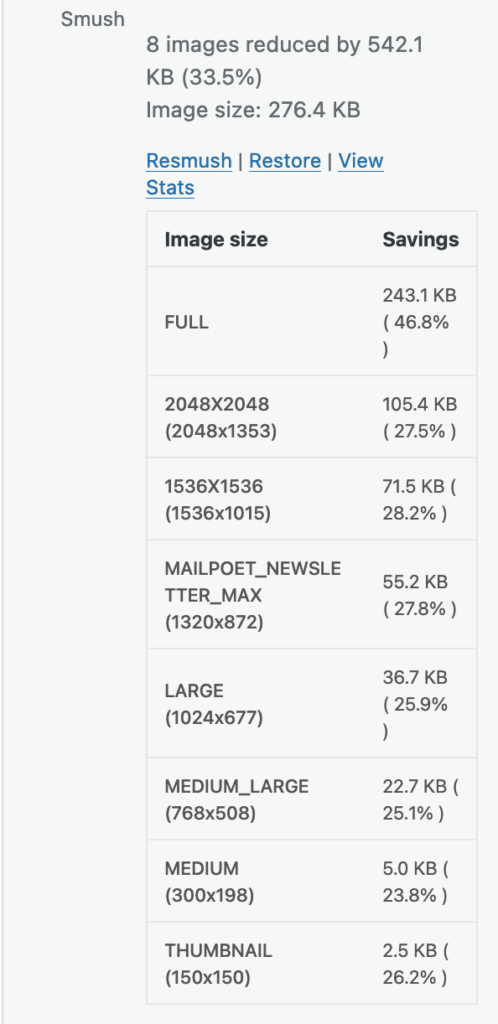
This seems like a “duh” but it’s easily overlooked. Use a plugin like Smush to optimize already uploaded media. If you use the free version, it may take a while, but it will properly resize your media and update it in your site for you. Since the file sizes become smaller, it also means they load a lot faster. Smush can also optimize media as it’s uploaded. This way, you don’t ever have to think about it. It just does it.
Remove unused elements from theme builders
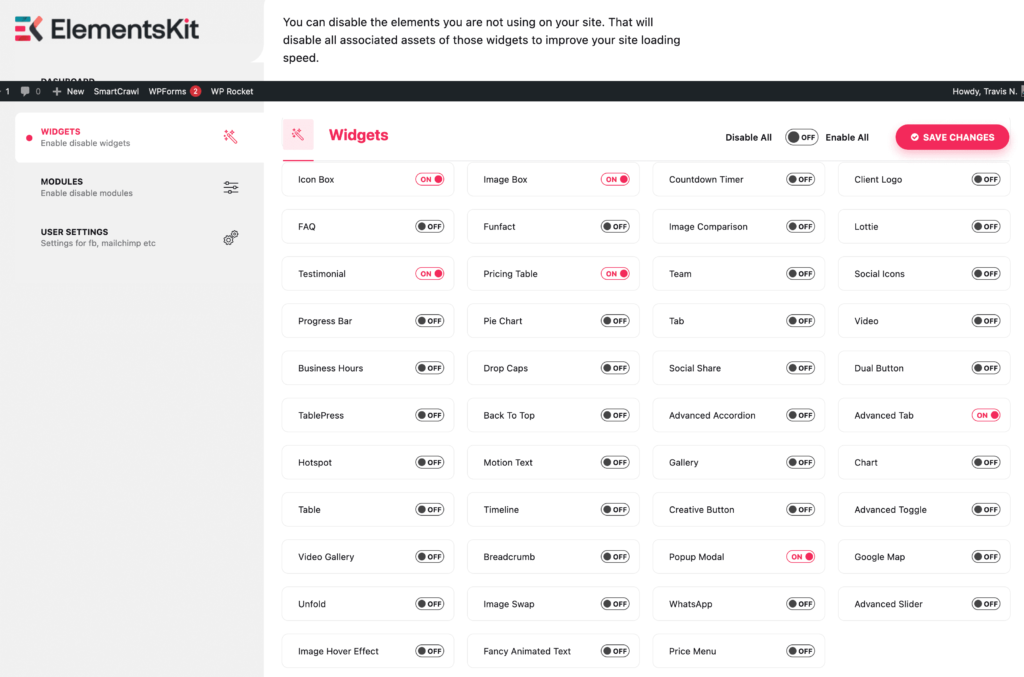
If you’re using a theme builder like Elementor, you may have downloaded or bought some extensions that add elements to your site. Or maybe your theme shipped you some. When you see it, it might be tempting to enable all the elements because you might use them! After all, that one image carousel looks really great and you love the way that Call To Action element works. That image element makes things sparkly. And this one can even add snow, leaves, or falling Easter eggs! But don’t enable all the elements unless you actually use them. Loading unnecessary elements can cause your site to slow down a lot. We noticed we had way too many enabled. So we scaled back to what we were using.
Delete old revisions from your database
If you have had your site for a while, you probably have a lot of post and page revisions. Some of our pages had several hundred revisions (like our dedicated servers page). We’re not planning on bringing back the design or configurations from 2016, so why do we need to carry that around in the database? While it doesn’t necessarily cause the site to load slower, it can extend query times as MySQL has to look through all those revisions to find newer posts. When you optimize your database, you can make things several milliseconds faster.
Get a caching plugin
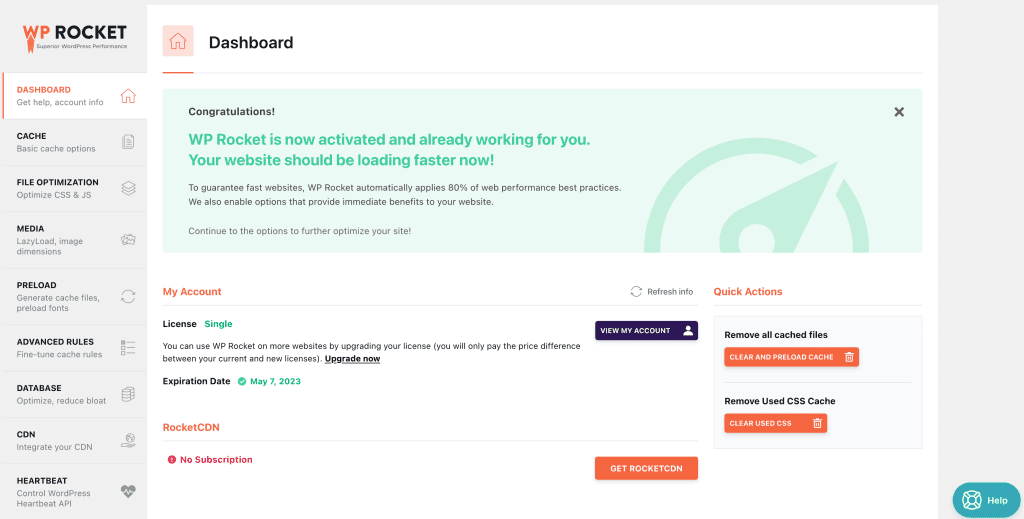
Now that you’ve de-bloated your site, you should get a caching plugin. We use WP Rocket, which is a paid plugin, but it works extremely well! We found the right settings that work for our theme and server, and it does a really great job. You don’t have to go the paid route, either. For a long time we used WP Fastest Cache. This free plugin does exactly what it says. It’s one of WordPress’s fastest caching plugins. No matter what route you go – free or paid – you will need to play with the settings to find the one that works best for you. When we updated our theme, we found WP Fastest Cache just wasn’t working right and we didn’t want to ditch the theme. So we found WP Rocket played nicely. Once we tweaked it, it really made our site fly!
Use a CDN
Another must-do is to use a CDN for your static bits. A CDN will get your static files on edge servers around the world. This way when a visitor hits your site, instead of loading everything from your server, it pulls some data like images, CSS, and JavaScript files, from an edge server closer to them. So while your site is fetching pages and other dynamic content, those assets are already to go.
Like caching, CDNs come in free and paid flavors, too. JetPack has a great free one we used for a while. The nice thing about JetPack is that it just works. If you’re not too technical and you don’t want to risk breaking something, JetPack free or paid will be the way to go. If you are a little more technical, most of the paid CDN services let you set your own domain like cdn.nodespace.net (or cdn.yourdomain.com). Personally, your end users won’t care where the assets are loading from. So this isn’t a deal breaker for us.
Another great CDN is Cloudflare. But Cloudflare can also do double duty. Not only will it cache your assets (but this does require some configuration!), it will also protect you from security threats like DDoS attacks. One of our sister sites, also protected by Cloudflare, was once hit with a DDoS attack so large, it made got picked up on some security blogs! The attack consumed nearly half a terabyte of bandwidth in a matter of minutes, but Cloudflare kept the site online and legitimate users had no problems accessing it.
If you do use Cloudflare, you’ll have to manage your DNS records which can be a little tricky. But the extra security is worth it.
Cloudflare Page Rules for Max Performance
On free accounts, you get only 3 page rules but that’s fine. That’s all you need! Page rules are processed from top down so it’s best to start with your most specific rules first. For rule 1, you should put in your site and wp-admin followed by a *. For example: www.example.com/wp-admin/* and set the options:
- Rocket loader: Off
- Security Level: High
- Apps: Disabled
- Cache: Bypass
Save the rule.
Rule 2 should be bypassing the cache on your preview pages. Create a rule with the URL that looks like: www.example.com/*&preview=true* with the options:
- Cache: Bypass
- Apps: Disabled
This will let you preview your pages and posts without triggering Cloudflare’s cache. Otherwise, they’ll get cached and you’ll have to keep clearing it.
Finally, we want our main rule that’ll cover our site. Set the URL like this: www.example.com/* and then set the options:
- Browser integrity check: On
- Auto minify: HTML, CSS, JavaScript (this may break things. Disable if needed!)
- Rocket Loader: On (this could break things. Disable if needed!)
- Cache level: Cache everything
- Edge Cache TTL: A month (set lower if you have a more dynamic site; since ours is fairly static, we keep it at a month)
And like that, you should start to see a huge increase in speed.
There’s no secret sauce
That’s really it! Just those tweaks and caching allowed us to reach a near perfect score on GTmetrix. Take a before and after screenshot and see how your WordPress site compares. If you have any suggestions or tips, leave them in the comments below or let us know on Facebook or Twitter!
See you in the fast lane!
